
5 DIY Home Projects To Do This Summer
Home decor crafts and projects are especially fun in the summertime because there is so much versatility when it comes to summer symbols, themes, and more. Whether you want to give your home a fun new style or just add a fresh accent for the summer season, you can easily craft your own decorations. DIY home decor is a great way to save money while still maintaining a stylish and unique space. Here are 5 DIY home projects to do this summer for an affordable and fun look.
1. DIY Coastal Seashell Wreath
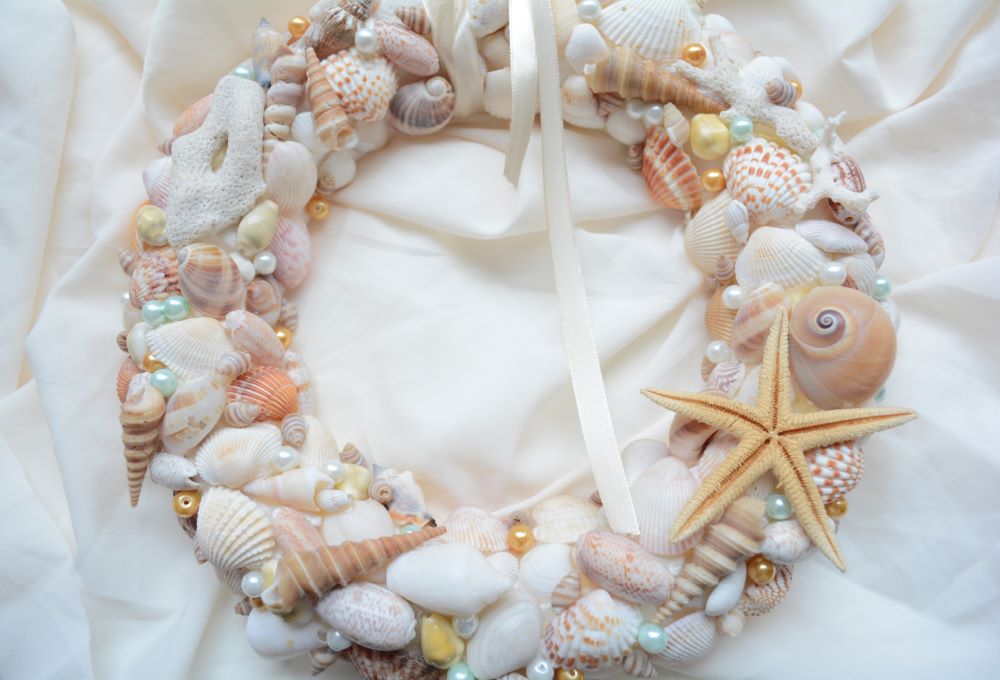
The coastal decor style is always a great choice for summer because of all the beach elements it contains. This coastal seashell wreath is a perfect DIY home decor project for summer! With fairly easy steps to follow, this craft will give your porch a beautiful summer look.
Feel free to use crafting seashells if you don’t have a collection of real ones. However, if you do use real ones, make sure to wash them thoroughly before creating the wreath. This craft can be a bit time consuming and a little tedious, but if you have the patience, you won’t regret making it!
Supplies Needed
Hot glue guns
Styrofoam wreath
Seashells
Ribbon
Pearl beads
Instructions
- Lay out all your seashells. If you’re using real shells, make sure to clean them and dry them thoroughly.
- Heat up your glue gun. Note: make sure to use a low setting to avoid melting the Styrofoam.
- Start gluing shells to your wreath in small sections. Make sure to overlap the shells as much as possible. You want to cover up as much of the wreath as you can. This is a bit time consuming, but it’s all worth it for a beautiful wreath!
- Once you’ve covered your wreath in shells, it’s time to fill in the extra tiny spaces. Glue pearl beads in these areas to cover up the wreath.
- Let the wreath dry.
- Finally, tie a strong ribbon to the top of your wreath and hang it on your front door for a coastal style porch!
2. DIY Hanging Bottle Flower Vases

If you’re looking for a fun decoration to display on your covered porch or patio, these DIY hanging bottle flower vases are a wonderful choice! An easy craft for the summertime, you can create a stunning display for your summertime barbecues or outdoor parties.
The fun thing about this craft is that there are so many alternative ways to make it. Feel free to paint the bottles, use a ribbon instead of rope, and even fill the vases with fairy lights or colorful stones. Decorate it in your own style to fit into your outdoor space!
Supplies Needed
Glass bottles
Burlap rope
Hot glue gun
Instructions
- Place a sufficient amount of hot glue towards the top section of the bottle.
- Carefully wrap the burlap rope around the glue until you have fully covered the top section. Cut off the end.
- Next, create a loop of burlap rope for hanging. Hot glue each end of the loop securely to the bottle.
- Make sure to let the glue completely dry before hanging up.
- Note: if you use real flowers, you’ll probably only want to display them temporarily because they might not last long in a vase outside.
- You can also fill the vases with fairy lights for a magical look!
3. DIY Tin Can Luminaries
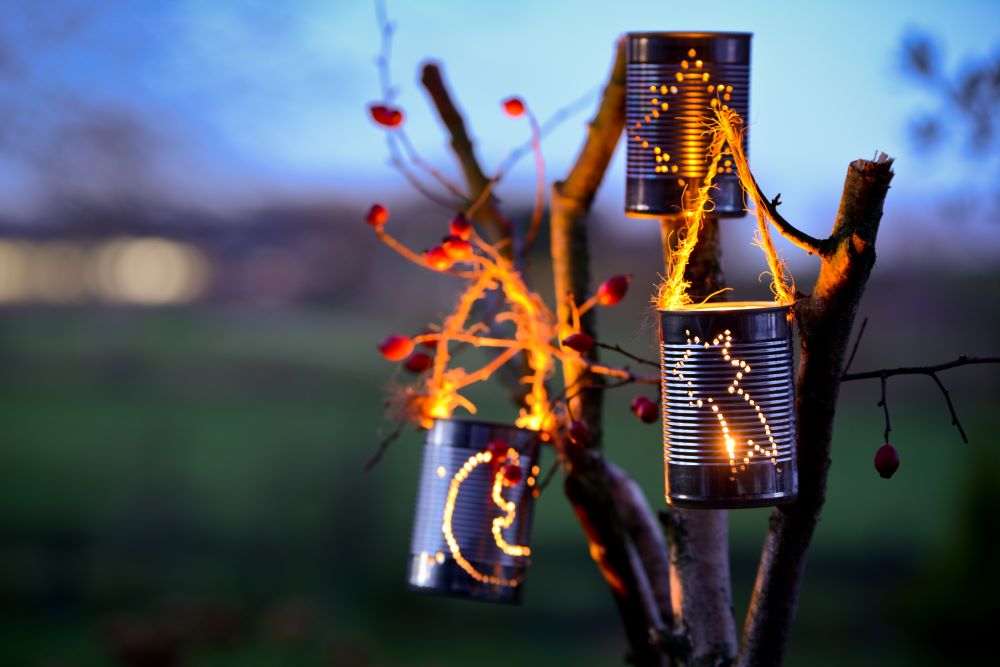
If you want to create a magical and beautiful glow in your outdoor summer space, these DIY tin can luminaries are a nice option. Not only is this craft very easy to do, but it also results in a unique decoration that will look nice displayed in your backyard, patio, or porch all summer long.
This DIY craft allows you to use almost any shape that you want to create your glowing lantern. Whether you want to use a star, a moon, hearts, or the sun, you can truly make these lanterns match your style. Make sure to clean out your tin cans before you do this craft.
Supplies Needed
Tin cans
Print-out shapes
Nail
Hammer
Marker
Candles
Instructions
- Start by tracing your cut-out shapes onto your tin can. These shapes should be big enough to make an impact but small enough to fit without wrapping around too much.
- Use the hammer and nail to create small holes along the marker outline. Make sure to not hammer in the nail too deep. You want the holes to be big enough for the light to shine out but still maintain a soft glow.
- Finally, place your candles inside the tin cans!
- You can either display them outside on a table or even hang them up around a tree for a magical backyard.
4. DIY Suncatcher Windchime
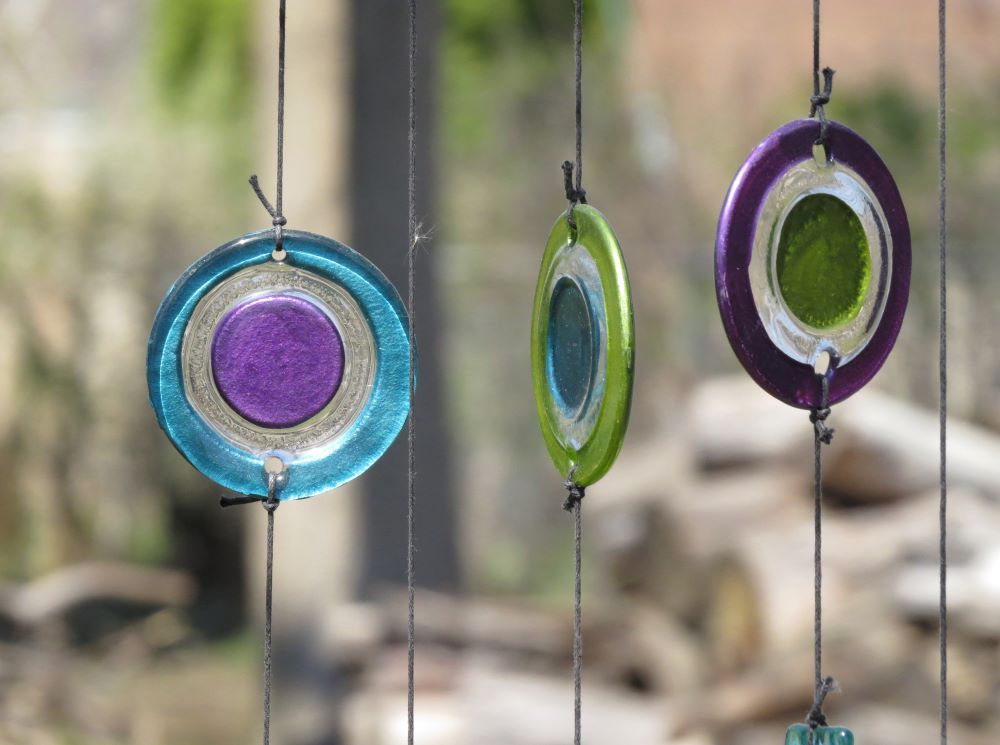
Let the summer sun shine through with the help of these beautiful DIY suncatcher windchimes! This is a great supervised craft to do with older kids and it results in a stunning decoration that can be displayed outside or inside.
Feel free to use any color combination of the plastic shot glasses you want to make the design match your personal style or to complement other decorations. You can use this outside as a combination of a windchime and suncatcher, or you can use it inside your window for a bright suncatcher inside your home.
Supplies Needed
Plastic Colored Shot Glasses
Muffin Tin
Beads (Optional)
Fishing Line
Metal Loop
Drill
Instructions
- Start by preheating the oven to 200 degrees. Put a different colored plastic shot glass into each section of your muffin tin. Remember the more variety in colors that you have, the more unique it’ll look.
- Put the muffin tin in the oven. Make sure to monitor it carefully. When you melt plastic in your oven. It will emit a strong smell. Keep the windows open to allow fresh air to flow in.
- Take it out when the plastic is almost completely melted. Add another colored shot glass on top of each melted color and put back in the oven.
- Monitor the muffin tin yet again until they’re completely melted. Let them cool down completely before removing each plastic disc from the tin.
- Next, cut about 5-6 pieces of fishing line in various lengths. The lengths are up to your discretion, based on how you want it to look. Then, carefully drill a small hole into each plastic disc towards the top.
- Start stringing your plastic discs onto each string. You can optionally string on some beads in between each disc for a unique look.
- Tie your decorative strings onto a metal loop. Then, tie another piece of fishing line on the top of the loop so you can hang it up. Hang it from your front porch or hang it on the inside of your window where the sun shines the most!
5. DIY Fresh Lemon Bar Soap
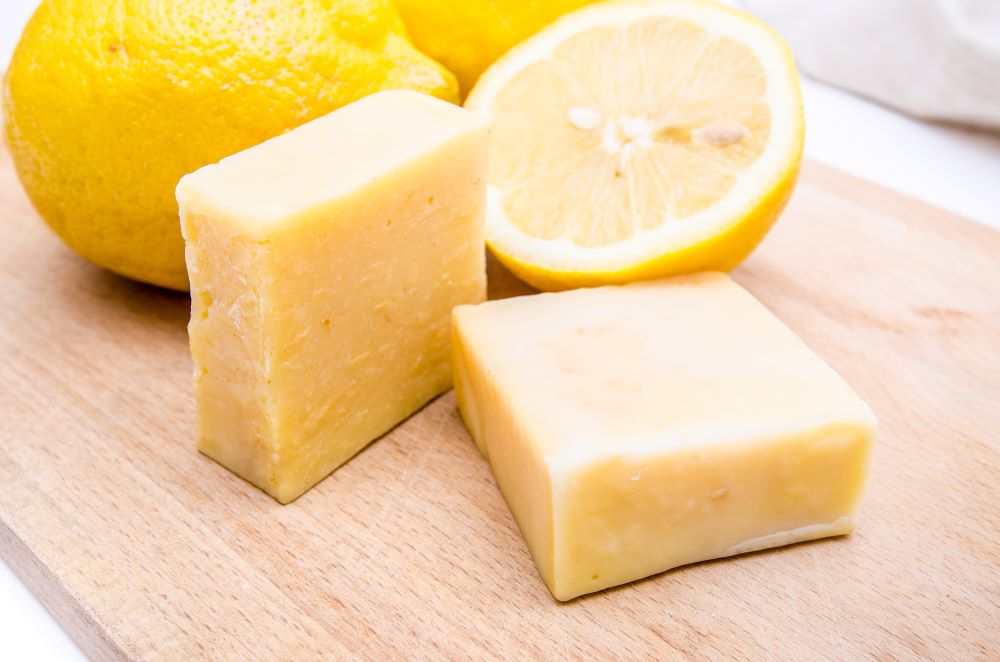
Another strong element of summertime is fresh and fruity scents. A great way to bring those scents into your home is through handmade soap! This DIY fresh lemon bar soap is sure to bring some vibrant and bright scents into your bathroom or kitchen this summer season.
These bars of soap are incredibly simple to make and they smell wonderful. You can even swap out the lemon and opt for a different fruity scent instead. Just follow the same steps but use a different scented oil. Incorporate your fruity soap bars into your home throughout the summer for a fresh smelling home.
Supplies Needed
1 1/2 cups shea butter soap base (cubed)
4-6 drops lemon essential oil
Dried lemon zest (3-4 lemons)
Soap molds
Instructions
- Once you’ve cut your soap base into cubes, place them into a microwave safe bowl and microwave it in 30-second intervals, carefully stirring in between.
- When it’s fully melted, drop your lemon essential oil drops into the mixture followed by the lemon zest.
- Note: if you want to really color your soap, feel free to use some drops of yellow food dye into your mixture.
- When it’s mixed to your liking, pour the mixture into your soap molds.
- Allow the mixture to harden in the molds for at least 1 hour, and then release the soap bars.
It’s time to get started on these DIY home projects for summer! Looking for even more summer inspiration? Shop our selection of Home Decor to find home collections, wall art, candles, curtains, and more to transform your home for the summer season.


Would like to have a book send to my home
Hi- We would be more than happy to send you a catalog. You can request your free catalog by clicking on the link below. Please allow 3-4 weeks for your catalog to arrive- Happy shopping! https://www.ltdcommodities.com/catalog_request/index.jsp