
5 DIY Repurposed Outdoor Decor Ideas
You don’t have to spend a lot of money to get a beautiful outdoor summer space. Making your own outdoor decorations is an affordable way to brighten up your space and make it feel fresh for the season. You can easily repurpose old materials and old items and transform them into wonderful decorations to display in your yard and garden. Whether you’re crafty and handy or just a beginner, DIY outdoor decor is something that almost anyone can do! From planters to unique accents to lighting and more, here are 5 DIY repurposed outdoor decor ideas.
1. DIY Chair Garden Planter

You can easily make this first craft if you have an old wood chair sitting in storage or if you find an old chair at a thrift shop. Using old furniture as makeshift planters is the perfect repurposing idea for the summer season. Not only do they add an eye catching piece to your yard, but they’ll also nicely complement other rustic decorations.
Feel free to paint the chair any color of your choice, or leave it the way it is for a truly authentic rustic look. Whether you place the chair in the middle of your garden or on your patio, this chair planter will stand out in a new and decorative way. Have fun displaying your favorite plants or flowers inside of a unique looking planter!
Supplies Needed
Old wood chair
Burlap plant liner (cut it to fit the size of your chair’s seat)
Coco fiber planter liner (cut it to fit the size of your chair’s seat)
Staple gun
Paint (optional)
Instructions
- First, you’ll want to prep your chair. Start by removing the seat. Depending on the type of chair you use, you may only have to drill out some screw or you might have to use some other tools to remove it.
- Next, you can sand down and paint the chair for a fresh appearance. If you the rustic look, simply leave it the way that it is.
- Once your chair is prepped the way you want it, you can place the burlap liner inside the chair seat hole. Staple gun the edges to the chair.
- Then, place the coco fiber liner on top of the burlap liner. Staple gun to secure it.
- Finally, you can place potting soil and flowers directly into the liner.
2. DIY Repurposed Wheelbarrow Planter
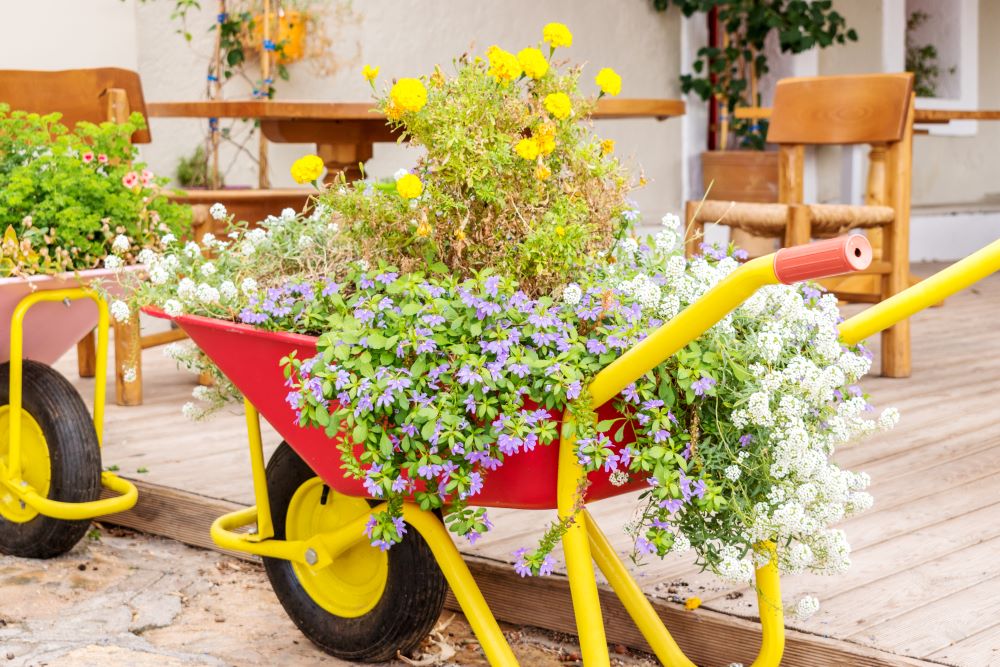
Like many of these other repurposed outdoor decor ideas, this one makes use of an item that you may have lying around. If you have an old wheelbarrow, make use of it and turn it into a planter. This project is incredibly easy and simple to do; it just requires a few steps before planting.
Keep in mind that wood wheelbarrows are more susceptible to rotting from water. You may want to use a metal wheelbarrow or another material that will hold up better with watering. Feel free to pain the planter or keep it in its original form for a rustic and antique look. You can display this out in the middle of your garden or even on your patio.
Supplies Needed
Old wheelbarrow
Drill
Steel garden stake staples (optional)
Paint (optional)
Instructions
- Start by drilling holes in the bottom of your wheelbarrow. This is highly important; every planter needs proper drainage holes for water.
- Next, you can touch up your wheelbarrow with paint if you wish. Depending on the style that you want, you might want to leave it the way it is for a more rustic look.
- If you’re placing the wheelbarrow planter in your yard, secure it down with steel garden stake staples. However, if you’re placing it on your patio, it should stay sturdy on that surface.
- Finally, you can add your potting soil and flowers for a unique display.
3. DIY Tire “Mushrooms” Garden Decor
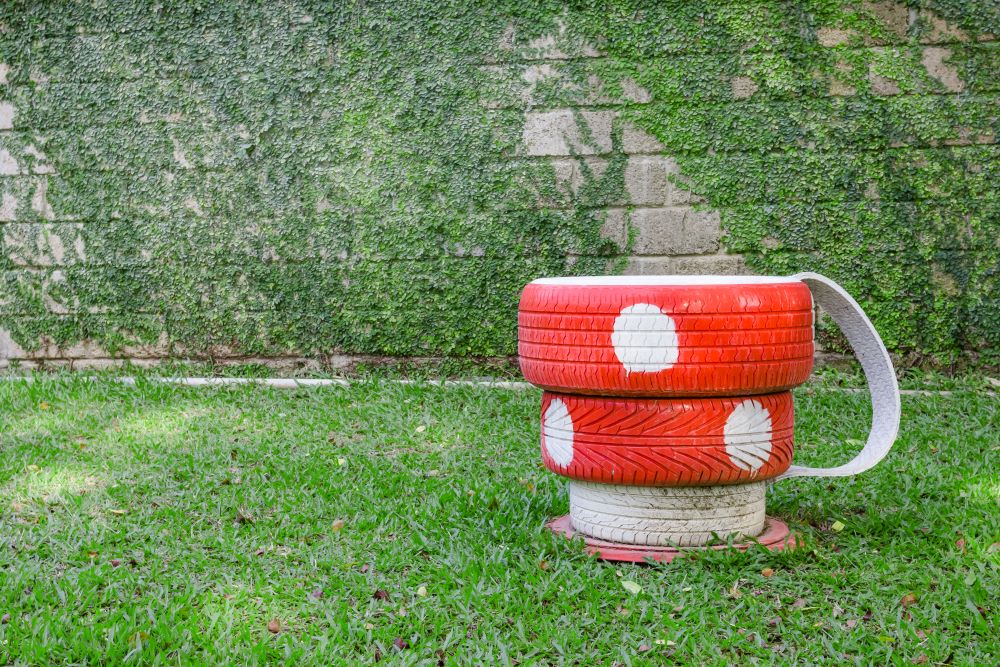
If you’re looking for repurposed outdoor decor ideas that are more on the artsy side, this craft is the one for you! These DIY tire “mushrooms” are cute and interesting and are the perfect addition to any yard or garden. Feel free to make just one to stand out in your space or DIY multiple tire mushrooms to create a fun looking outdoor area.
These mushroom tires can also be used as planters in your yard. Simply fill them with potting soil and plant your favorite flowers or plants. You just might want to select taller planters for these, seeing as the stacked tires go up fairly high. You can also leave them on their own as decorative accents and pair them with other mushroom themed yard decor such as stakes and statues.
Supplies Needed
3 tires (1 small, 1 medium, 1 large)
Red spray paint
White spray paint
Drill
Nuts and bolts
Instructions
- Start by prepping your tires for the craft. Scrub them down thoroughly until clean.
- Now it’s time to spray paint. Spray paint the smallest tire white and the other tires red. Let dry.
- Once dry, you can add the white circles to your red tires. You might want to use a template to help you get the perfect circles. Let the circles dry completely.
- When the paint is completely dry, it’s time to attach the tires together, starting with the small one on the bottom, followed by the medium, and then the large.
- Drill holes toward the middle of each tire and line them up, attaching them with the bolts and nuts. Note: make sure to mark where you want the holes to be before drilling. It might be a little challenging to line the tires up perfectly, so take your time here.
- Finally, you can display your unique mushroom in the yard or garden. You can even fill it with flowers as a makeshift planter!
4. DIY Repurposed Glass Jar String Lights
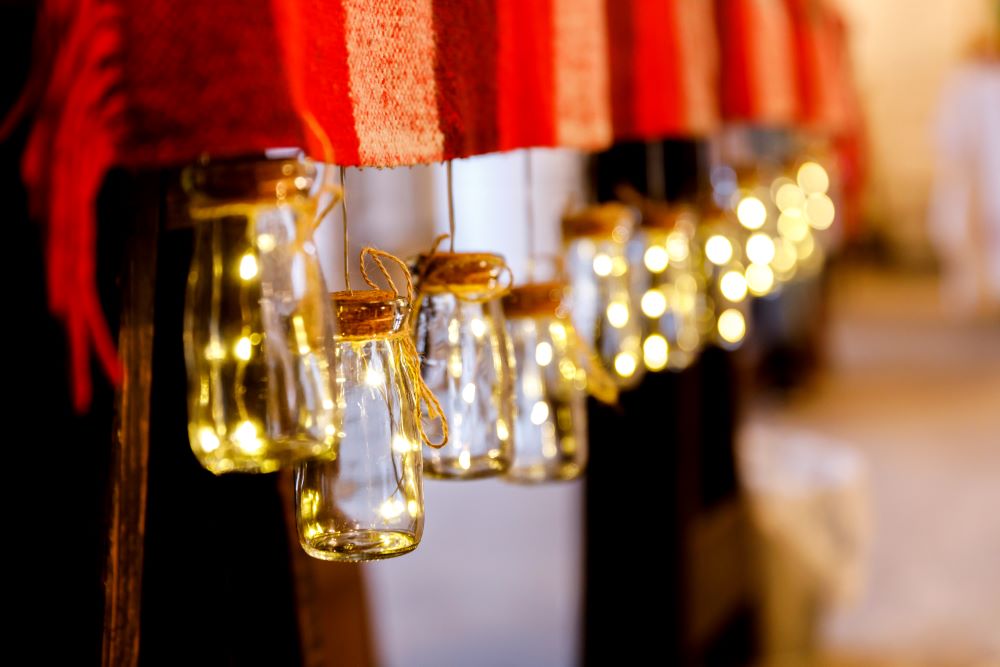
Next on this list is something magical; there’s nothing more magical than fairy lights! Make use of your old food jars and create these easy DIY glass jar string lights. This is probably the quickest repurposed outdoor decor idea on this list and it results in a beautiful decoration that will light up your space all summer long.
You can use almost any type of jar you want for this DIY hack. Using the same types of jars for all of your lights will create a more uniformed look; however, feel free to use a variety of jars for a more unique touch. You can also choose to paint your jars to bring some color to your space. Just make sure to use a translucent paint so the fairy lights will still shine through.
Supplies Needed
Empty jars (any kind)
Twine
Fairy lights
Drill
Hot glue gun
Instructions
- If you’re using old food jars, make sure to clean them out thoroughly before starting this craft.
- Drill 2 small holes on the top of each jar lid, then cut a piece of twine for each lid. Stick each end of the twine through a hole, creating a small loop on the top for hanging. Secure each end by hot gluing them to the inside of the lid. Let dry.
- While your glue is drying, you can place your fairy lights inside of each jar. It’s easiest to use solar fairy lights so you don’t have to worry about a battery pack.
- Once the glue is dry, you can place the lids back on the jars and hang them in your outdoor space!
5. DIY Flower Pot Saucer Fairy Garden
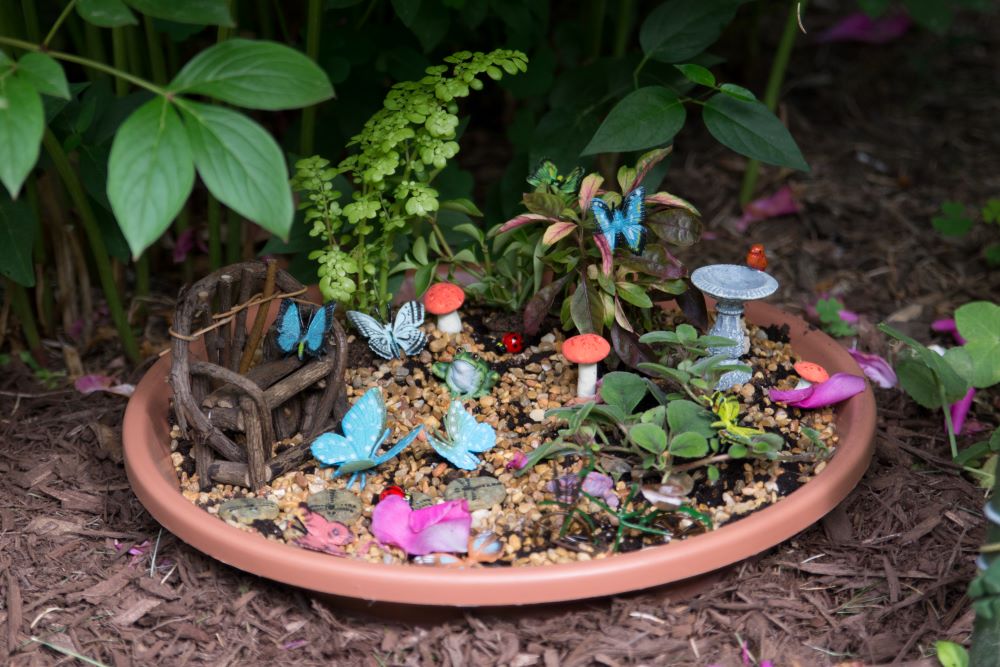
When your flower pot cracks, you probably just throw it out. However, a great way to repurpose it is to take the pot’s saucer and turn it into a mini fairy garden! Fairy gardens are adorable little setups you can create with your own personality and ideas. The great thing about this craft is that you can decorate it almost any way you want.
You can display these saucer fairy gardens almost anywhere in your yard. Place it on the ground in the middle of your garden, display it on your patio, or even show it off on your outdoor table. Make use of your old pots and add this craft to your list of DIY repurposed outdoor decor ideas.
Supplies Needed
Flower pot saucer
Pebbles/gravel
Mini decorations (mushrooms, butterflies, etc)
Mini faux plants
Hot glue gun
Instructions
- Start by filling the bottom of the saucer with pebbles or gravel. You can even use glow in the dark pebbles for a fun nighttime look!
- Next, add your mini decorations. This can truly be anything you want it to be. For instance, you can add a mini bench, mini mushrooms, butterflies, and little fairy figurines. Create whatever scene you want to create.
- Then, feel free to add some mini faux plants and flowers to liven it up.
- Note: you’ll probably want to hot glue gun all your decorations to your saucer to keep them secure.
- Finally, display your saucer fairy garden in your outdoor space!
Now that you’ve gathered some fun DIY repurposed outdoor decor ideas, check out our Outdoor Decor section to find even more ways to complete your space! Find solar lights, garden stakes, planters, and much more to make your yard feel decorative for the summertime.


