
5 Creative DIY Flower Pots & Planters To Make This Spring
Flowers and plants can look even more beautiful when they are planted inside of colorful and decorative pots and planters. Crafting your own pots and planters can turn your home and garden into a spring wonderland. Here are 5 creative DIY flower pots and planters to get you started.
1. DIY Mosaic Flower Pot
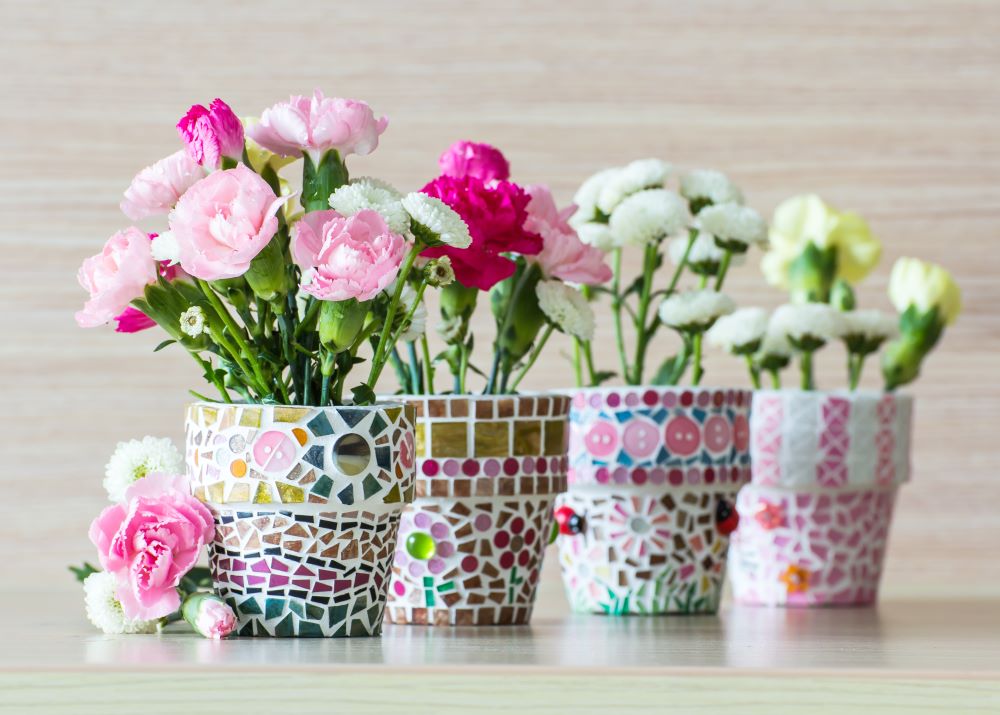
Mosaic art can turn anything into a beautiful and colorful masterpiece. These mosaic flower pots are perfect for spring time and will look nice displayed outside with the rest of your garden or inside on a windowsill.
Be as creative as you want with this DIY project; find uniquely patterned plates from a thrift store and mix together different colored tiles to create a flower pot that matches your personal style!
Supplies Needed
Terra Cotta Flower Pot
Tiles Or Old Plates
Polymer-Fortified Thin-Set Mortar
White Sanded Grout
Hammer
Butter Knife
Gloves
Wire Brush And Cloth
Instructions
Step 1: Wrap your tile pieces or plates in cloth and carefully hammer them into pieces. Make sure the pieces are small enough to fit on the pot. Note: each piece should vary in size to make your design more interesting.
Step 2: Stir together the thin-set mortar with water until it’s a thick consistency. Using a butter knife, spread the mix onto the back of each tile or plate piece and stick them each onto the pot. You can create a random pattern or plan your pattern before you start placing your pieces. Note: make sure to leave a small amount of space between each piece on your pot.
Step 3: After you’re done applying your pieces, leave the pot overnight to set.
Step 4: Now it’s time to apply the grout. Mix together the white sanded grout with water until you get a thick consistency. Put your gloves on and slather it onto the empty spaces in between your tile pieces all around your pot. Wipe off any excess grout using a wire brush and cloth.
Step 5: Let dry completely before filling the pot with soil and flowers.
2. DIY Wooden Crate Planter
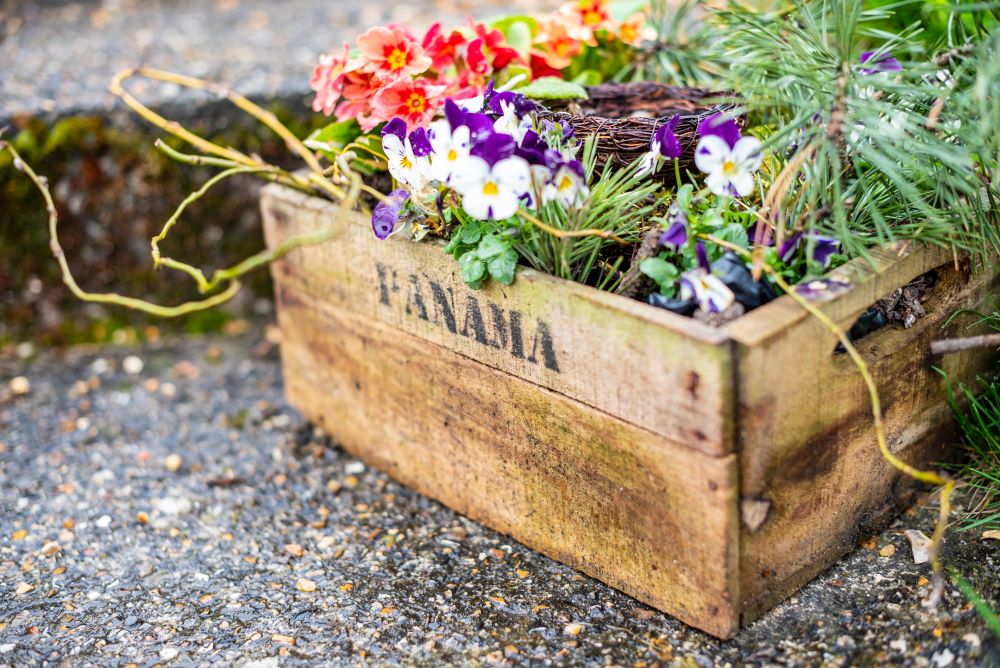
These DIY wooden crate planters will blend in well with farmhouse decor or country themes thanks to their rustic charm and distressed wood appearance!
Whether you have an old wooden crate sitting around in your home, you find a charming crate at a thrift store, or you pick a fresh one up from a craft store, you can easily make this planter look wonderful in your garden or on your front porch.
Supplies Needed
Wooden Crate (From Home, Thrift Store, Or Craft Store)
Burlap (If Crate Has Slatted Bottom)
Drill (If Crate Has Solid Bottom)
Paint (Optional)
Instructions
Step 1: Choose your wooden crate. You might have some old wooden crates sitting around, or you can find some unique ones at a thrift store. You can also easily find one at a craft store.
Step 2: Whichever type of wooden crate you choose, make sure you have adequate drainage. If you have a slatted bottom crate, line it with burlap to prevent the soil from spilling out. If you have a solid bottom crate, drill small holes in the bottom to allow for water drainage.
Step 3: Optionally, paint the crate the color of your choice.
Step 4: When you’re ready to plant, use potting mix instead of regular garden soil because it’s lighter and will drain better in a container.
3. DIY Cement Flower Pot
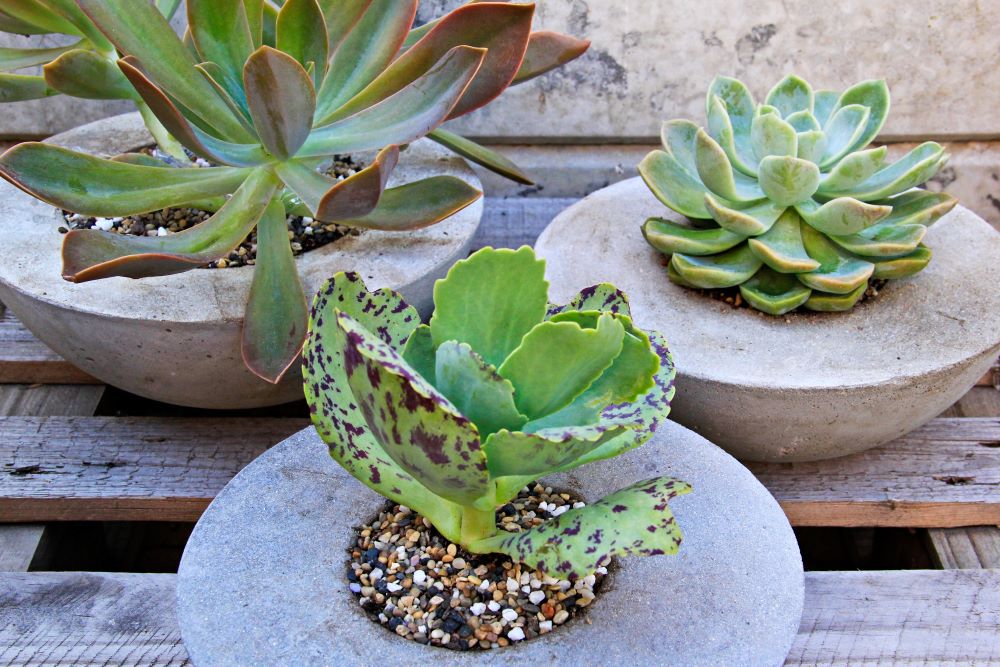
Cement flower pots are sturdy and look great with any type of decor style, both indoor and outdoor! Whether you paint them a bright color or leave them the natural cement color, they will look unique and decorative.
Please note that you should work carefully and quickly with your rapid cement mix. Depending on the mix you buy, it can take anywhere from 5 to 15 minutes to set – make sure you follow the instructions on your cement bag.
Supplies Needed
Plastic Container For Outside Cement Mold
Smaller Plant Container For Inside Of Cement Planter
Plastic Sheeting
Plastic Straws
Rapid Cement Mix
Sanding Pad
Latex Gloves
Outdoor Paint (Optional)
Instructions
Step 1: Make sure your plastic containers are cleaned and dried. Prep some drainage holes by cutting holes on the bottom of your outside container and the bottom of your inside container. Stick your inner container inside the outer container and then place straws into the holes to keep cement from getting in.
Step 2: Prep your work space with plastic sheeting and put your latex gloves on. Then, mix your cement according the package’s instructions.
Step 3: Pour the cement mixture into the outer container, leaving the inner container empty and surrounded by the cement. Note: weigh down your inner container with rocks during this step to hold it down and keep it in place.
Step 4: Remove your inside container about 5 minutes before the cement sets. Then, remove the straws once you see some condensation form on your cement – it’s important to do this right before before it completely sets.
Step 5: Pop the cement out of the plastic container mold right before it’s fully set. The timing of this is important.
Step 6: Using your sanding pad, rub down your cement planter until it’s completely smooth all around.
Step 7: Let it set for 12 to 24 hours. Optionally, paint your planter with outdoor paint in any color!
4. DIY Car Tire Planter
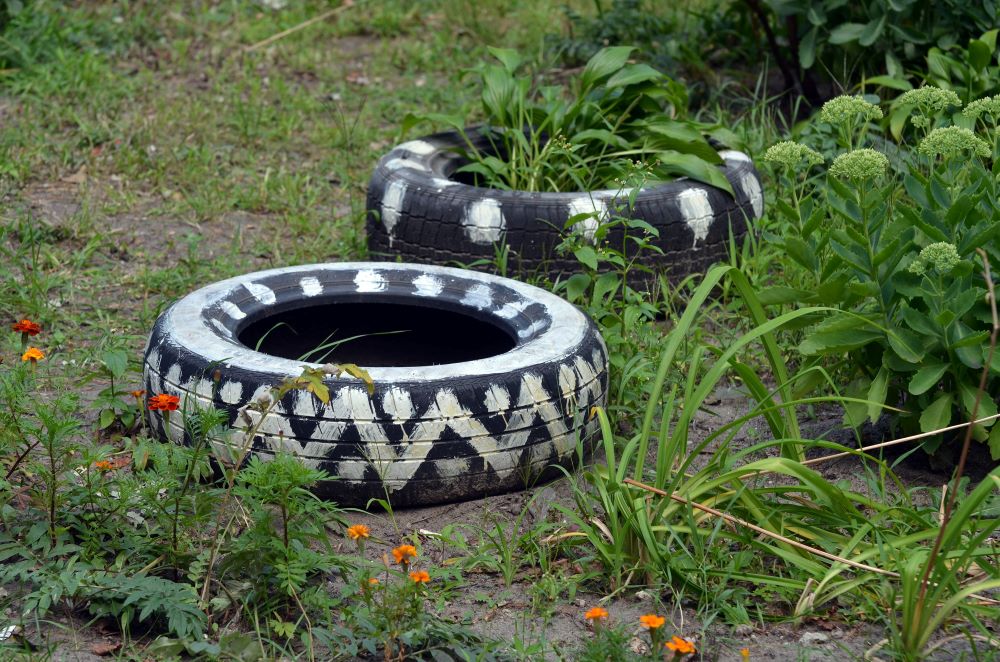
These tire planters are an interesting way to add some decor to your backyard garden!
Decorate these tire planters in any way you want – you can paint them a bright color, create a fun pattern, or make them more subtle. It all depends on the style and layout of your garden.
Supplies Needed
Car Tire
Spray Paint Primer
Spray Paint
Large Pattern Stencil (Optional)
Instructions
Step 1: Start by spraying your tire with primer and let it dry before moving on to the next step.
Step 2: Spray paint the tire with any color of your choice. You can either spray the entire tire with one color, or you can spray on a pattern using a large stencil.
Step 3: Let your paint dry thoroughly.
Step 4: Place your tire planter in the middle of your garden on top of a section of plants that you already planted into the ground. Note: make sure to use this on a section of plants that will fit inside the tire as they grow. You don’t want to squish the plants together because they won’t grow properly.
5. DIY Tea Kettle Planter
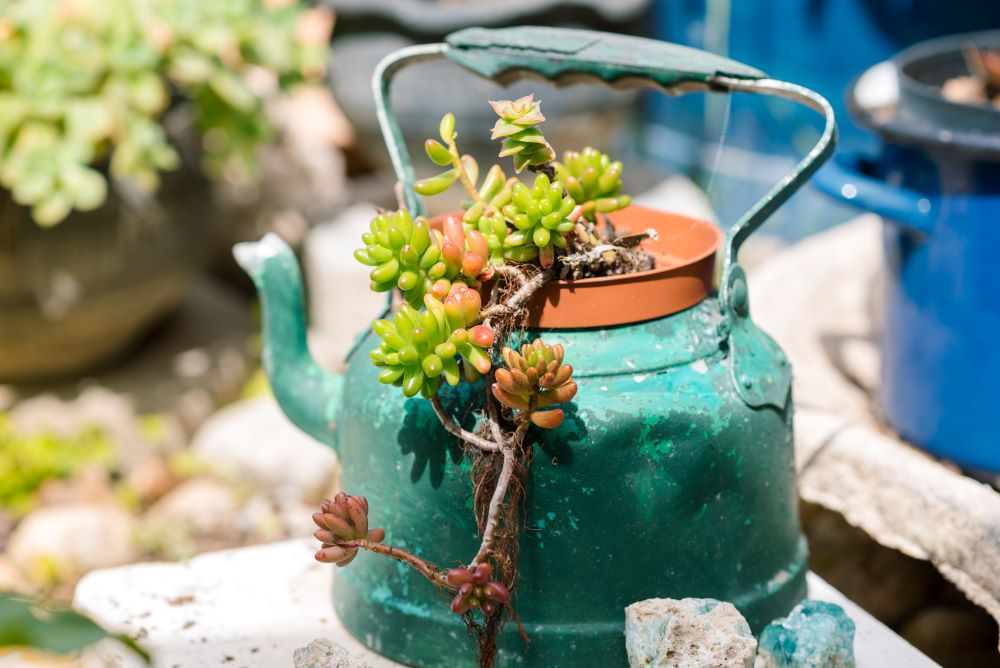
This DIY tea kettle planter is a cute and easy creation that you can use for small houseplants! Display this anywhere in your house to give any room a touch of vintage charm.
You can use any type of tea kettle for this project; however, these instructions are specifically for a stainless steel kettle.
Supplies Needed
Stainless Steel Tea Kettle
Etching Primer
Two Part Epoxy Paint (Any Color)
Instructions
Step 1: First, you must prep your tea kettle. Completely remove the lid of the tea kettle – you won’t need this anymore. Then, drill small holes on the bottle of the kettle for drainage.
Step 2: Next, prep the tea kettle’s surface before painting by using etching primer. This step is important because it’s challenging to get paint to adhere to stainless steel.
Step 3: Paint the kettle with two part epoxy paint in the color of your choice. Make sure it dries completely.
Step 4: Insert a plastic container planter inside of the tea kettle with your soil and plant.
Looking to decorate and grow your garden this spring? Shop our collection of Planters & Gardening Supplies for unique planters, fun outdoor decor, helpful gardening tools, and much more!


How can I get a catalog?
Hi Janice – We can send you a catalog. Please know that the catalog can also be viewed on our website. Please click on the following link to request a catalog.
You should receive your catalog within 3-4 weeks! http://ow.ly/jztt304cBRc
I will try this in my new porch it is easy to do and looks good.
Without any doubt, 5 idea is much creat and cheap also. These do not only increase our beauty. It’s also the way of recycling waste products. Great idea you have to implement.