
7 DIY Garden Projects Anyone Can Do
Your springtime garden and outdoor space should feel welcoming, warm, and refreshing. Whether you’re looking to save money or if you just want to put a personal touch on your yard, DIY decorations can transform your garden for the new season. From garden accents to homemade planters and more, here are 7 DIY garden projects that anyone can do this spring.
1. DIY Succulent Wreath

Succulents are beautiful and unique, and this DIY garden project takes them to the next level! Making a faux succulent wreath is a great way to display something eye-catching in your yard all spring and summer long. This project is pretty easy to put together; you’ll want to make more than one!
While this specific craft calls for faux succulents, you can also use real succulents – simply use a moss wreath instead and keep the wreath flat until the succulents bloom. Faux succulents make it a little easier to create this craft and it allows you to keep it on display for a longer period of time. No matter which route you choose, you’ll be left with a beautiful wreath that you can hang on a tree in your yard, on your front door, or on a garden stake wreath holder.
Crafting Instructions
Supplies Needed
15″ Foam Crafting Wreath
Faux Succulents With Stems
Scissors
Instructions
- Start by planning a rough design by laying out your succulents. You can also place them randomly for a more unique look.
- Insert the faux succulent stems into the foam wreath. You may need to cut the stems down first if they’re too long.
- Make sure to cover up all the blank areas of the foam; you might want to use some smaller sized succulents to fill in the spaces.
- Once your wreath is complete, you can use a decorative ribbon or some yarn to hang it from the door or from a hooked garden stake.
2. DIY Concrete Garden Globes
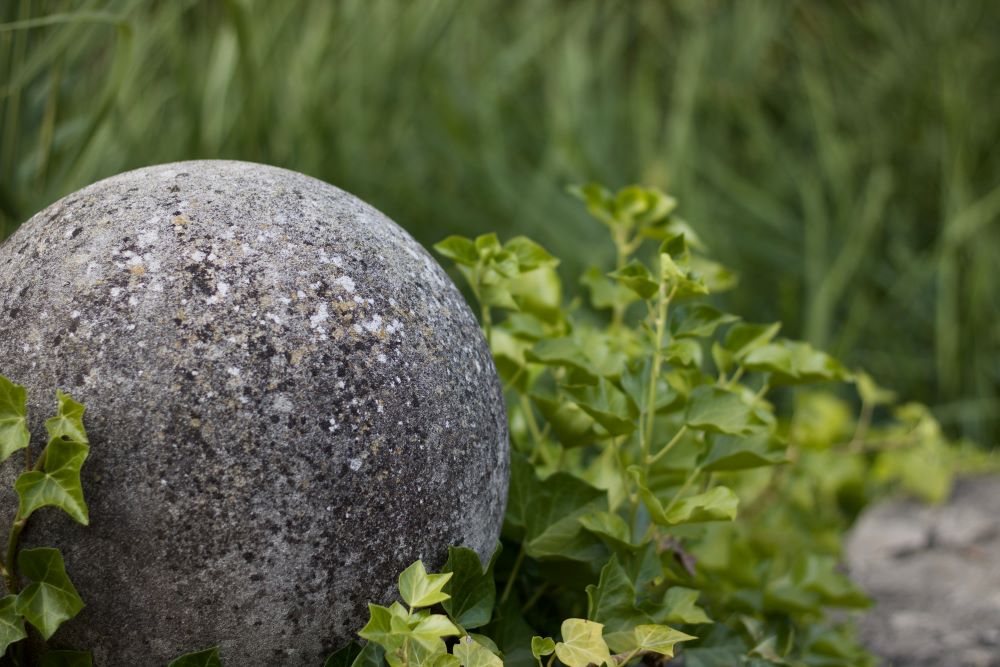
Concrete garden accents are a unique element to add to your outdoor space because they’re a mix of rustic, natural, and bold. Outdoor concrete decorations can sometimes get pricey, that’s why these DIY concrete garden globes are the perfect affordable alternative!
These globes are fairly easy to make, and you can create them in a variety of sizes depending on the types of vases you use. They’ll look nice displayed in your garden or along your pathway combined with other springtime decorations. You can even use some on top of planter stands on your front porch for an unexpected look.
Crafting Instructions
Supplies Needed
Round Glass Vases
Portland Cement
Peat Moss
Water
Large Container (for mixing)
Wooden Stirring Stick
Rubber Gloves
Cooking Spray
File
Wire Brush
Hammer
Protective Goggles
Instructions
- Prep your vases by spraying them down with cooking oil. This is highly important for the dried concrete to come out smoothly.
- Mix together your concrete mix: 1 part cement, 1 part peat moss, and water. Make sure to add enough water so the mixture isn’t too thick.
- Carefully pour the mixture into your vases – make sure to not fill the neck of the vases. You want them to be as round as possible.
- Keep your vases upright inside of plastic bags and let them sit for about 2-3 days until they cure. Keep them in a cool space to help with the curing process.
- Once cured, hammer the vases to break the glass around the globes. Make sure to wear your protective goggles and keep the vases inside the bags to prevent a mess.
- After you’ve broken all the glass off, file off your globes to smooth them down. If you want a rougher look, use a wire brush.
- Display in your garden!
3. DIY Hanging Garden Tins
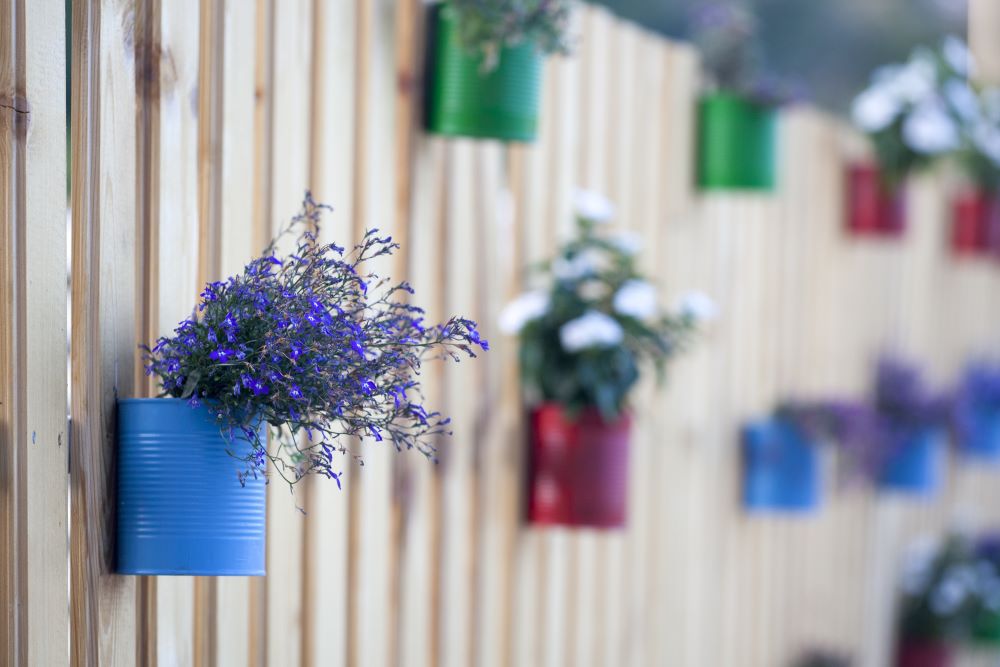
A wonderful way to brighten up your garden and yard is to add some decorations to your fence. The fence is like a blank canvas/background for your garden, so why not give it a little springtime fun! These hanging garden tins are a simple yet cheerful DIY garden project that will instantly transform your fence.
Feel free to use any sized cans that you want and any colors of paint that you desire. You can find tin cans at many stores, or you can upcycle any food cans that you have in your house. Start saving a collection of cans so you can create a unique collage on your fence. This craft allows for creativity and flexibility!
Crafting Instructions
Supplies Needed
Tin Cans
Acrylic Paint (any colors you want)
Paint Brush
Drill
Steel Strapping Cutter
Hooks
Outdoor Finishing Spray
Instructions
- Start by painting your tin cans any colors that you want. If you want to create a bright display across your fence, opt for a large variety of colors. If you want more of a subtle and clean look, choose a simpler color palette.
- Let them dry and then set them with finishing spray.
- Carefully drill draining holes in the bottom of each can.
- Use the cutter to cut out a small space towards the rim – this is where they’ll hang from the hooks.
- Install the hooks on your fence where you want the planters to hang. You can either use metal hooks that you nail into the fence, or you can use command hooks that stick on.
- Finally, fill your tins with flowers and soil and hang from the hooks on the fence.
4. DIY Fairy Garden Flower Pots
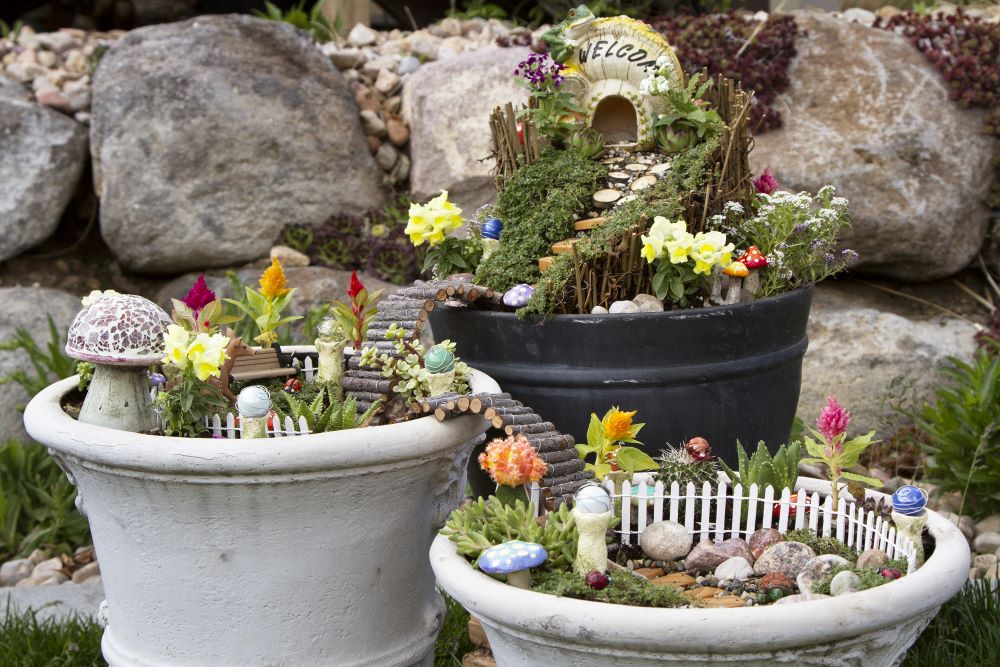
If you’re looking for a DIY garden project that is truly unique and fun, these fairy garden flower pots are the craft for you! Whether you make a small display or a large mystical one, these are sure to stand out nicely in your garden and you’ll enjoy the view all spring long.
You can usually find mini figurines and mini accessories in almost any craft store. They’ll typically have many different choices that you can pick from to decide on the look of your pots. Generally speaking, these fairy flower pots will have fairy figurines, mushrooms, and moss, but you can really add almost any accents to give them your own magical touch.
Crafting Instructions
Supplies Needed
Mini figurines: fairies, mushrooms, fences, benches, houses, etc.
Decorative Stones
Decorative Moss
Flowers & Potting Soil
Instructions
- No matter what you want your fairy garden pots to look like, you’ll want to first start by planting your flowers. Make sure to leave a sufficient amount of room for all your decorations and fairy add-ins. You’ll probably only want to plant several flowers spread out in the pot.
- Now comes the fun part: setting up your fairy land! You can do this almost any way you want to, but here are some ideas:
- Start with a mini fence in the pot and place some moss and stones in front of it.
- Then, set up a few mini decorative mushrooms.
- Place a mini house in the center with a fairy nearby.
- Use some other decorations in the pot if you have room.
3. You can even create a fairyland of multiple flower pots that connect to one another. Connect each flower pot with the use of mini wood bridges.
5. DIY Mosaic Garden Stepping Stone
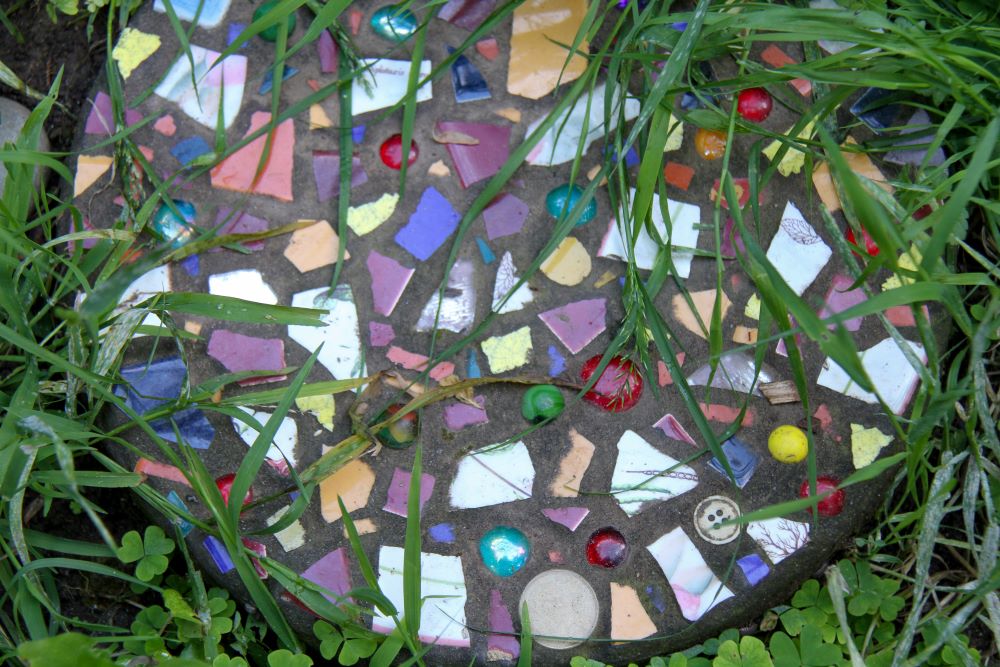
Mosaic decorations are lovely for the spring because of their beautiful collage of colors! Craft some easy-to-make mosaic garden stepping stones to add to your outdoor space this warm weather season. This DIY garden project won’t disappoint.
You can use mosaic tiles for this craft, or you can even smash up some old plates and dishes for an alternative look. Feel free to use any size cake pan to create your stepping stone; it depends on how much space you have in your garden. You can easily create a beautiful path of mosaic stepping stones that lead to your blooming garden in your backyard.
Crafting Instructions
Supplies Needed
Non-stick Cake Pan (round)
Contact Paper
Vaseline
Mosaic Tiles
Gemstones (optional)
Concrete
Marine Varnish
Chicken Wire
Bucket
Hammer
Trowel
Safety Goggles
Rubber Gloves
Dust Mask
Instructions
- Start by carefully hammering your mosaic tiles into small pieces. Make sure to wear safety goggles and cover the tiles with a sheet before hammering.
- Cut out a circle on the contact paper by tracing the cake pan to get the right size. Cut out the circle.
- Peel off the backing of your contact paper and set it sticky side up inside of the cake pan.
- Start adding your mosaic pieces face down onto the stick side of the contact paper. You can also add some gemstones if you want. Make sure to leave some room in between all your mosaic pieces and gems for the concrete.
- Mix your concrete according to the instructions on the bag. Each concrete brand may have slightly different instructions.
- Spread Vaseline around the inside rim of the cake pan. This will help you more easily remove the stepping stone when it’s done later.
- Now it’s time to add concrete. You’ll want to create a 1-inch layer in the pan. Be sure to smooth it out as much as possible.
- Next, cut out a square of chicken wire and place it on top of the first layer of concrete. This is to help provide extra support for a sturdy stepping stone.
- Add another 1-inch layer of concrete on top of the chicken wire and smooth out.
- Let the concrete dry and set for 2 days.
- After the 2 days, carefully turn your pan over and gently tap on the bottom to release the stepping stone.
- Remove the contact paper and then brush on marine varnish to finish it off.
6. DIY Wood Pallet Herb Planter
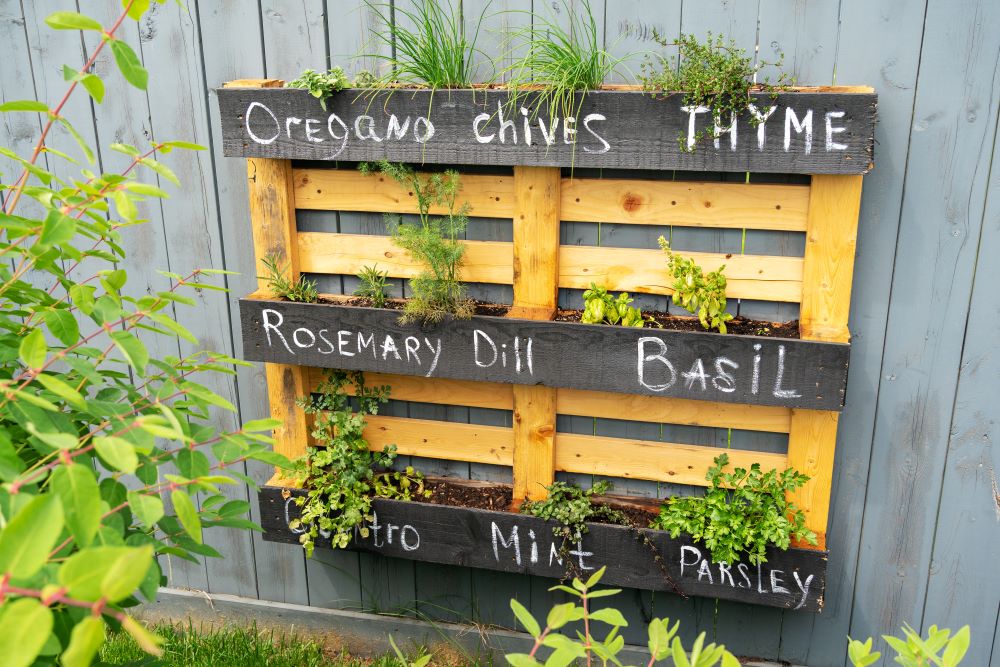
Wood pallet planters are a trendy and popular garden element due to their raw, rustic, and natural look. This DIY wood pallet herb planter will give you an interesting way to grow your herbs in your yard and it doubles as a unique decoration!
This craft looks much more complicated than it actually is. It won’t take you long to transform a wood pallet into a three layer herb garden. Just make sure to use enough landscape fabric to protect your herbs and to provide a sturdy environment for watering and growth.
Crafting Instructions
Supplies Needed
Wood Pallet
Sandpaper
Black Paint & Paintbrush
White Chalk Marker
Landscape Fabric
Staple Gun
Instructions
- First, sand down your wood pallet if there are any rough edges.
- Paint the main 3 horizontal wood pieces black and let dry.
- Next, cut up the landscape fabric to fit the width of your pallet. Cut a piece for each “box” section of the pallet. You’ll want to be able to fold the fabric around the bottom of each box section, so make sure to cut enough for each.
- Then, staple the fabric onto the pallet. Make sure to staple on all sides to keep it secure.
- Once you have your planter sections secured, you can finally add the potting soil and herbs inside.
- Label each section with a white chalk marker to keep track of what you planted.
- You can lean your pallet against the wall or hang it up with nails.
7. DIY Ladybug Garden Rocks
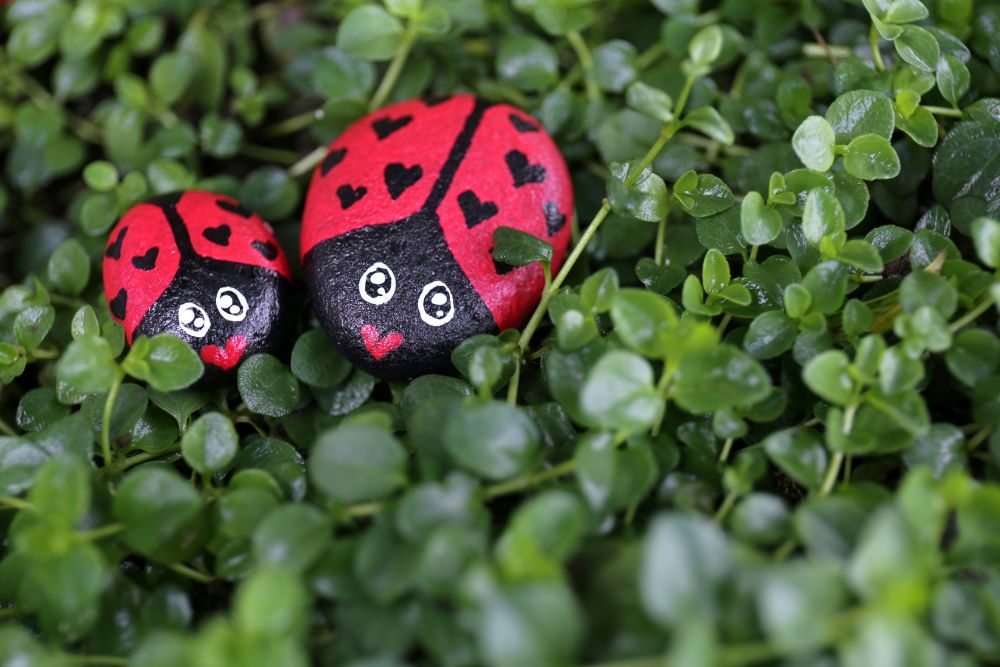
These adorable DIY ladybug garden rocks are a fun detail to add to your garden! This DIY garden project is so easy and simple, that you can even make it a family craft and get the kids to help out. Everyone can make their own unique ladybug to add to the garden.
In addition to ladybug garden rocks, you can also paint other spring creatures and bugs onto rocks. If you want a mix of characters and designs in your garden, paint your rocks with butterflies, bees, bunnies, sunflowers, and more. Spread them around to add some small accents around your entire yard.
Crafting Instructions
Supplies Needed
Smooth Stones (various sizes)
Red, Black, & White Paint
Small Paintbrushes
Aerosol Varnish
Instructions
- Start with the black paint: paint a small triangle shape on the top for the face with a line going down the center.
- Fill in the black triangle with the black paint, and fill in the other 2 sections with red paint. Let dry.
- Once dry, you can paint the ladybug’s black spots – feel free to paint cute hearts or go with the traditional dots.
- Paint the ladybug’s eyes with white paint and black for the details.
- Then, paint on a red “nose/mouth” in the shape of a heart.
- Let the paint dry.
- Finish it off with an aerosol varnish to keep the acrylic paint safe in the rain.
Now that you’ve learned some easy DIY garden projects, visit our Garden Center for even more spring inspiration! Find live plants and flowers, outdoor decorations, solar lighting, and much more to transform your garden.


So cute ideas. Something to do at my women’s church group
Love all of the DIY projects that you have posted. I can use all of them troughout my garden and landscaped areas