
How To Paint A Room: A Beginner’s Guide
A fresh paint job can transform any room in your home and make it feel brand new. If you’ve never painted a room before, it might feel intimidating to get started. Luckily, painting a room involves easy steps that almost anyone can do! Whether you’re looking to paint your bathroom, bedroom, or another area of your home, you can get the job done with little to no complications. Here is a very simple beginner’s guide on how to paint a room.
How To Paint A Room: Supplies Needed
Before you begin your painting, it’s important to make sure you have all the supplies you need. Your local hardware store should have all the necessary supplies, so that means you just have to take one trip to the store to gather your items! You’ll also typically want to have a paint color chosen before you get your supplies. You can research paint colors online, or you can go into the store to review paint chips and even get some samples if you want to test out the colors in your room. If you aren’t sure what color to go for, ask an expert for advice.
Here are the supplies that you’ll need to add to your shopping list before you start painting:
- Painter’s Tape
- Drop Cloths
- Angled Paintbrush
- Roller Brush
- Paint Tray
- Paint (1 gallon per 400 square feet)
Step 1: Prep The Room With Painter’s Tape & Drop Cloths

Before you can begin transforming your room with color, you need to do some prep work. If your walls and baseboards are a little dusty or dirty, make sure to first wipe them all down. It’s important to have a clean surface for your paint to go on as smoothly as possible and to look its best.
Once your walls are clean, it’s time to start taping. Lining your room with painter’s tape can be a tedious process; however, it’s a necessary step in order to prevent paint from getting on areas that don’t need it. Tape the top edges of your baseboards to protect them, along with edges of other areas such as around the window trim and around the sides of the door and closet. You’ll also want to make sure to remove electrical plates and tape your outlets to protect them.
Finally, lay out your drop cloths to cover the entirety of the floor. You can hold the cloths in place by taping the edges of them onto your baseboards. This will prevent you from accidentally moving the cloth, which could cause paint to drip onto the floor. It’s always better to be safe than sorry, so make sure to take your time with taping and laying down the cloths before you start painting.
Step 2: Paint The Edges Of The Entire Room
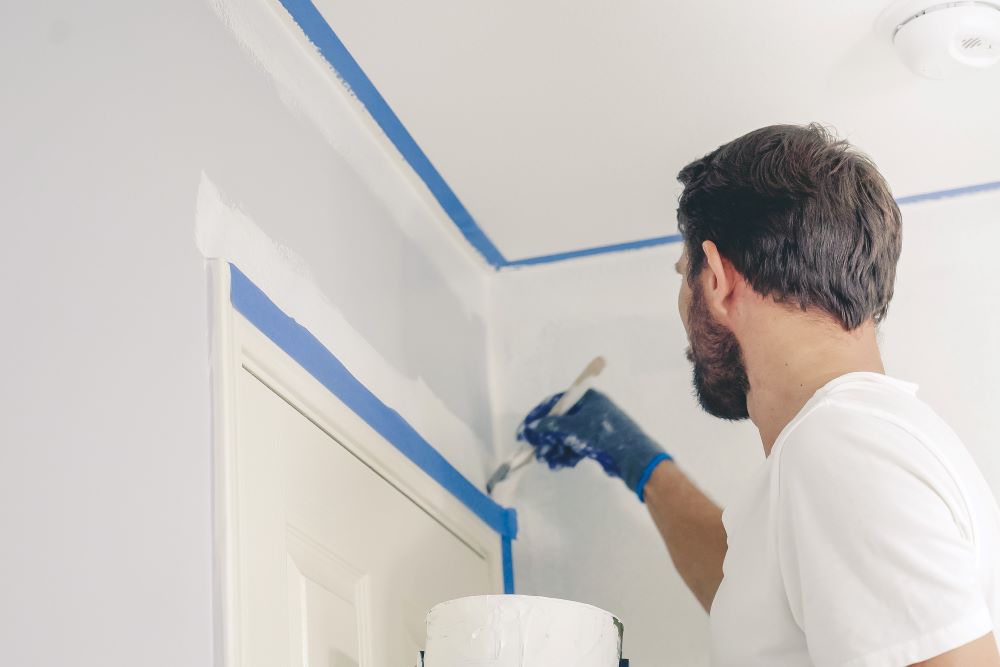
Now that you’ve prepped, you’re ready to start the actual painting process! The first step of the actual painting is to paint the edges of the room, otherwise known as cutting in. Some people choose to cut in after painting the entire wall, but doing it beforehand is best for beginners.
The edges of the room include the inner corners, the top edge near the ceiling, the bottom edge near the baseboards, the edges around the doors and windows, and any areas that are too small for a roller brush. Use an angled brush to get the best precision for cutting in.
How To Paint A Room: Tips For Cutting In The Edges
- Pour your paint into a smaller bucket or can to dip your brush in. This can make it easier to get the right amount of paint on your brush.
- Dip your brush about an inch into the paint and then let the excess paint drip off into the can or bucket before painting.
- When painting near the ceiling, make sure to keep your hand in one position the whole time for a single, steady line. Use the top corner of your angled brush to get the very top of the wall line. Then, paint slightly below your top line to make sure your roller brush won’t hit the ceiling when painting the rest of the wall.
- Make sure to use a good amount of paint in the inner corners of the room – these areas tend to be thirsty for pain. Additionally, when painting the inner corners, make sure to paint on the wall slightly outside of the corners wherever a roller brush wouldn’t be able to reach.
- Have a wet cloth ready for any mishaps. If you accidentally get some paint on the ceiling, it can quickly be wiped away with a wet cloth as long as you do it while the paint is still freshly wet.
Step 3: Paint The Rest Of The Walls With A Roller Brush
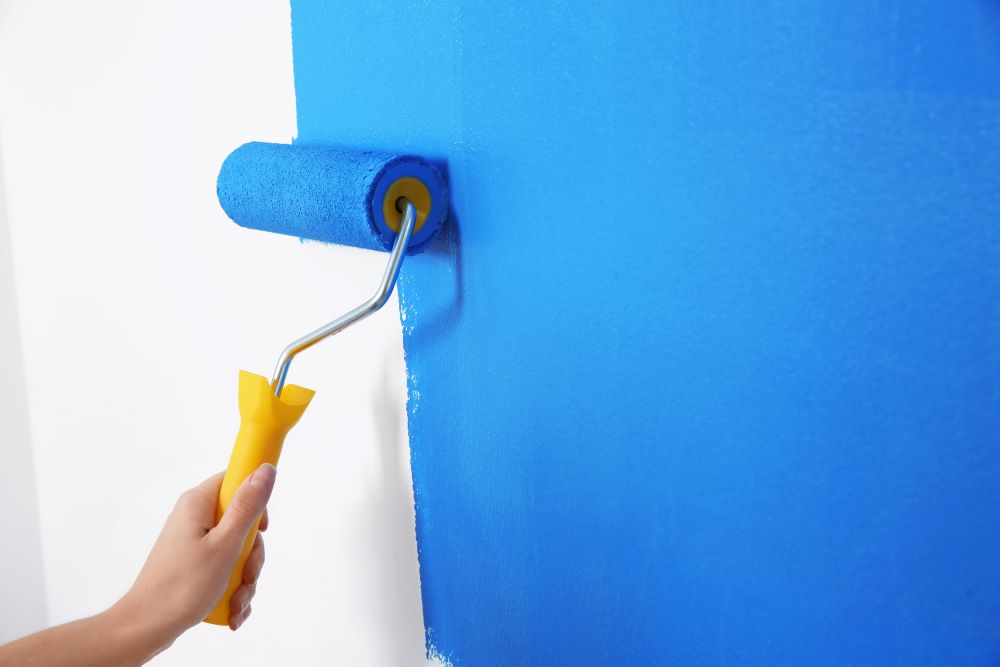
Once you’ve cut in the edges of the room, you can finally paint the entirety of the walls with a roller brush. This is an exciting step because you’ll see your room come together with the color that you chose! There are many methods of painting your walls with a roller brush, but if you’re a beginner, these steps may be the easiest choice for you.
How To Paint A Room: Steps To Painting With A Roller Brush
- Start by pouring a small amount of paint into your paint tray. You’ll just want to fill up the bottom section of the tray.
- Place your roller brush towards the top edge of the paint in the tray, and then roll it out on the rest of the tray. You want enough paint on the brush to cover a decent amount of the wall, but too much paint will cause a mess.
- Roll your brush up and down in a slight zigzag pattern to paint your wall. Once your brush gets low on paint, roll down on the areas you painted, from the top of the wall to the bottom. This will help prevent any dripping or clumping.
- Refill your brush with paint, and repeat the process until all your walls are covered.
- If you have 2-coat paint, make sure to let your walls dry before painting on your second coat.
- Remove the tape once it’s all completely dry.
Step 4: Paint The Baseboards & Ceiling If Needed
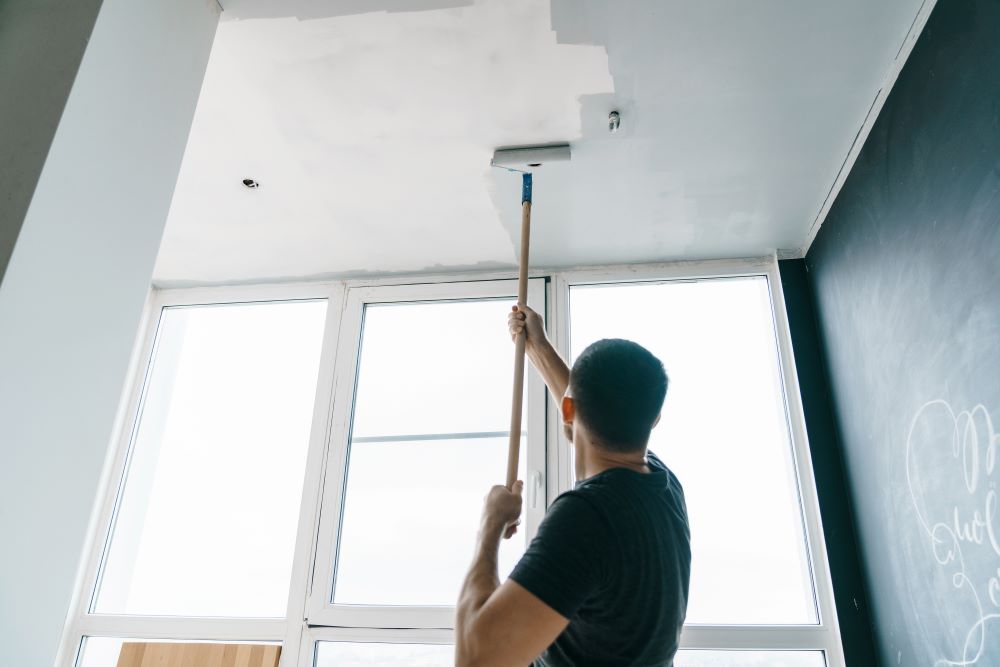
Now that you’ve learned all the simple steps on how to paint a room, you might want to consider painting your ceiling and/or baseboards. This is only necessary if your ceiling hasn’t been refreshed in a long time, and if your baseboards have scratches and chips.
Painting your baseboards is also a fairly easy process – start by taping the top edges of the baseboards to protect your walls. Then, tape a drop cloth down to protect the floors. If you’re in a carpeted room, you’ll want to tape the floor and tuck the tape underneath the baseboards by using a paint scraper. Use a small paintbrush to complete the paint job.
If you want to paint your ceilings, make sure to get a paint roller extension pole to make the job easier. Line up the tape near the top of your walls to protect them. Then, cut in the top edges of the ceiling using the same method as described earlier. Use your long roller brush pole to cover the rest of the ceiling.
After you refresh your walls with paint, change up the style in your room with our selection of Wall Art! Shop unique wall hangings, sentiment signs, canvas art, photo frames, and much more!


